Yoga Cross-Training for Skiers
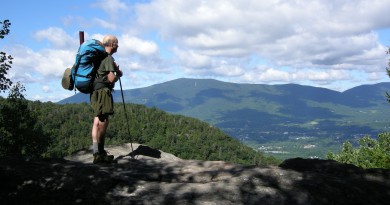
Whether your preference is cross-country, backcountry, or downhill skiing, Vermont’s versatile terrain is sure to challenge and inspire. To prepare for a rewarding ski season, it is wise to begin conditioning your body and focusing your mind now, while the snow is just starting to fly.
These five yoga poses will tone your body in ways that develop strength, flexibility, endurance, and grace—the same qualities that support expert skiers. This yoga sequence is designed to strengthen and stretch the muscles in your feet, legs, and pelvic floor, while increasing your hip and ankle mobility, and knee and ankle stability. Learning how to mindfully strengthen and stretch your major muscle groups balances your muscular system, while increasing flexibility in your joints. Increasing your strength and flexibility can prevent ski injuries. Practice this sequence during pre-season, and before or after a satisfying day out on your skis.
 1. Chair pose
Benefits: Strengthens the feet, ankles, calves, knees, thighs, hips, and back. Stretches shoulders, chest, and front side of the spine. Reduces flat feet.
Here’s how: Come to stand with your feet hip-width apart, and second toe facing forward. Bring your hands to your hips. Exhale, bend the knees as if to sit back in to a seat. Shift your weight toward your heels, lift and spread the toes. Keep the knees hip-width apart and pointed straight ahead. Curl your tailbone slightly down toward the ground to lengthen the backside of your spine. Draw your naval toward the spine and set your gaze above eye level. With an inhale, bring the arms up, palms face in. Keep your shoulders down the back as you reach the crown of the head up, neck long. Stay here for five to 15 breaths.
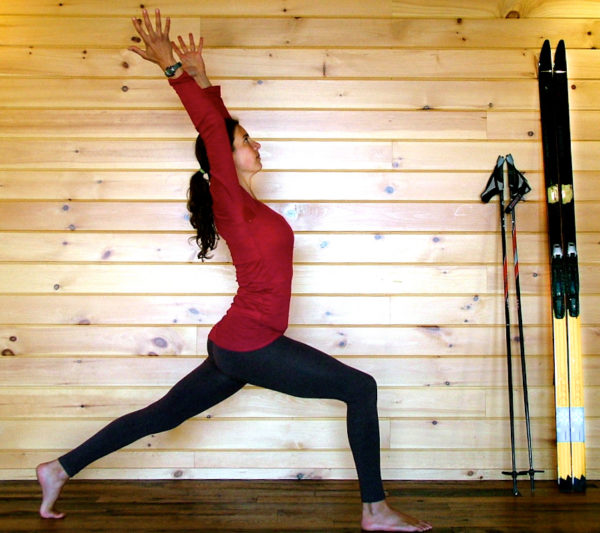
 2. Standing lunge
Benefits: Strengthens the front foot, ankle, calf, knee, thigh, and hip, while stretching the back foot, Achilles tendon, calf, hamstrings, and hip flexors. Strengthens abdomen and back muscles while stretching chest and shoulders. Increases balance and endurance, and good for reducing sciatica.
Here’s how: From standing, exhale to fold forward, bend your knees deeply so you can touch your palms to the floor. Gaze in front of your mat as you exhale your left leg back. Make sure your front knee stacks over your front ankle, do not let this knee lean out in front of, or to the side of, the ankle. Draw your right hip back and your left hip forward to tone the inner thighs. Root through the feet by drawing them toward each other to energize the legs. With the feet hugging toward center, inhale to lift the arms up overhead. Curl the tail and draw the navel toward the spine to tone the lower abdominal muscles and to support you in this backbend. Keep the back leg strong and lifted and the shoulders down the back, palms point in. Breathe here for five to 15 breaths.
 3. Knee down lunge
Benefits: Same as standing lunge, with a deeper emphasis on stretching the groin and hip flexors.
Here’s how: From standing lunge, place your hands on the ground, wrists below your shoulders, and gently lower your back knee to the ground. If your knee is uncomfortable against the ground, place some extra padding under it. Draw your hands back slightly, coming up on your fingertips, this will allow your spine to lengthen. Draw the shoulders down the back and look straight ahead. Keep your fingertips light on the ground, let the strength of your legs support the pose. Curl the tail forward and draw the legs toward one another. Keep your face muscles relaxed and tongue relaxed as you stay here for five to 15 breaths.
 4. Lower leg up the wall
Benefits: Stretches the quadriceps and front of the ankle
Here’s how: Come onto your hands and knees with your feet toward the wall. Back up to the wall and place your knee where the floor and wall meet. Use extra padding under your knee if you need it, and make sure your shin is right against the wall. Come up onto your fingertips as you begin to curl your tail forward, while pressing your lower leg into the wall. You might feel the stretch in your quadriceps here, in which case stay here. If you do not feel the stretch, then to go deeper, by stepping the front foot forward and keeping the hands down on the ground. Stay here, or to go deeper, inhale the hands to the hips. Stay in the pose for 10 to 25 breaths.

5. Legs up the wall
Benefits: Relieves tired and cramped legs and feet. Gently stretches the back legs, while reducing mild backache. Supports the circulatory system and calms the mind.
Here’s how: Come to sit, placing your hip against the wall. Slowly lower down as you shifting your head away from the wall and buttocks against the wall. Do whatever you need to do to make sure your buttocks and legs are against the wall, do not allow for any space between the wall and your buttocks. It can be awkward to get into this position, but once here, you will really enjoy it. Place your hands on either side of your torso, palms to the sky, or place your hands on your belly. Optional, you can place a towel under your lumbar curve or a pillow under your hips. Optional, have a friend place heavy books on the soles of your feet. Stay here for three to 10 minutes.