Sled Training for Athletes
All it takes is 10 minutes a day and a $15 DIY set-up to build the power you need for skiing, running or other sports, says sports performance coach Chris McKhann.
“At 46, I’m in the best shape of my life,” says Chris McKhann. That’s a bold statement from someone who ski raced at Harvard (Division 1), competes as a sprint cyclist on the track, is a certified Olympic weight lifting coach and now trains many of Middlebury College’s top athletes.
A decade ago, McKhann could barely walk. In 2006, the Middlebury resident discovered he had Lyme disease. Between 2008 and 2011, he was hospitalized five times with acute kidney failure, paralysis and heart and cognitive issues. “I went to a ketogenic diet,” he says. He also took antibiotics and started trying a new way to build back his strength: sled training. The combination seems to have worked. “I won’t say it cured me,” says McKhann, who has a physique that would make Kelly Slater jealous, “but as long as I stick to my diet and workouts, I feel great.”
What McKhann discovered during that time was that he could replace much of the high-intensity weight training he’d been doing in the gym with a very simple DIY work-out: Sled training involves, essentially, pushing or pulling a weighted “sled.”
“I first started making my own sleds when I was coaching the Middlebury Ski Club,” says McKhann. That was about four years ago. He cut the sides off tires, put a plywood bottom in them, attached a strap with handles and started adding weights (be it real weights, cinder blocks or small children) to the tires. “The kids loved them,” he recalls. McKhann launched a sideline (by day, he’s an educator in investment trading) of online coaching programs.

“Sled training allows you to build power without the risk of injuring yourself—there’s no heavy weight,” says McKhann. “There’s no eccentric loading, so there’s no overloading muscles which then leaves you sore the next day. And you don’t bulk up,” he says. At the same time, sled training can work just about every muscle in your body.
Athletes ranging from skier Mikaela Shiffrin and snowboarder Shaun White to swimmer Michael Phelps and surfer Laird Hamilton have adopted sled training to build up power. McKhann, who works with Middlebury College’s track and field teams, as well as the ski teams, also notes it’s particularly helpful for runners: “You can do a workout in 10 minutes that can build the same aerobic and anaerobic benefits and improve your VO2 max by as much as an hour-long run will,” he says.
Senior ski racer Lexi Calcagni has been working with McKhann and says training with a sled (she used a waist belt) really helped her come back after a shoulder injury. “Unlike weights in the gym, with sleds you’re moving and exerting power with every step. It’s perfect cross training for skiing. Since using sleds, I’ve felt more power in my legs and more ability to work past fatigue.”
McKhann recommends Tabata training, a high-intensity four-minute workout developed by Japan’s Dr. Izumi Tabata, where you do 20 seconds of maximum effort followed by 10 seconds of rest (or 40 seconds rest, if you are starting out).
In one study, Dr. Tabata had seven subjects do exhaustive intermittent training with seven to eight sets of exercises for 20 seconds at a high intensity with a 10-second rest between each bout. After doing so five days a week for six weeks, the subjects improved their VO2max and increased their anaerobic capacity by 28 percent.
McKhann recommends a circuit of four to six exercises with a “sled,” using either distance as a measure (say pulling or pushing the sled 20 or 30 yards) or timed 20-second on/40-seconds off sets. “All it takes is 10 minutes a day,” he says.
He recommends starting light and adding weight as you go. “The track athletes I’ve been working with start by loading the sled with 15- to 20-percent of their body weight. Sprinting with 90-percent of your body weight is great for building both speed and strength. Top athletes can pull up to 400 or 500 pounds and I heard one pro football player has loaded 1,000 pounds,” says McKhann. “I like to do a day of power workouts using less weight and going for speed, followed by a day of strength a couple of days later” McKhann says.
“The thing about sled workouts: you feel absolutely terrible right after you do them but an hour later, you feel great,” he says.
For more and videos, see sledrx.com
6 SLED WORKOUTS
Build or buy a sled, head out to the backyard or a local soccer field and you can do everything you can in a gym. These six workouts will get you ready for skiing, running or cycling.
1. Backwards Pull
With the sled in front of you, arms bent 90 degrees at the elbow, back straight and knees bent, walk backwards, pulling the sled. “This works your quads, back and knees, including the VMO (vastus medialis oblique) muscle that helps stabilize your knee,” says McKhann. For skiers, building that muscle can help prevent an ACL tear. It’s also helpful for shin splints. “It really works muscles in the front of your leg that often get overlooked. Pretty much everyone I’ve done sled training with who had shin splints has recovered,” he said.

2. Forward March/Run
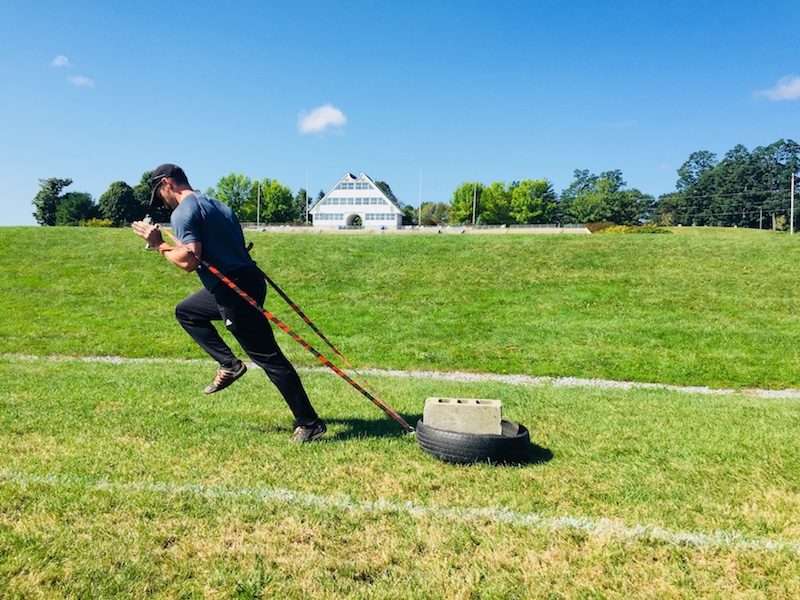
For this exercise, the sled is behind you. Grasp the handles and keep your elbows bent at 90 degrees. With a straight back and neck, lean forward and march or run forward. “Bring your knee up so it is parallel to the ground and keep your foot flat as it’s raised,” says McKhann. “Many athletes really don’t know how to run properly and doing this move helps.” The exercise really works the chest, triceps, abs and core as well as the posterior chain: hamstring, glutes and calves.

3. Sled Rows
“A sled row works a lot of the same muscles as a squat—your quads, glutes, upper back and biceps,” says McKhann. Facing the sled with the straps taut, squat down and then pull the sled toward you as you rise up. “This should be a quick move, where you drag the sled almost to your feet,” says McKhann, who notes that it’s best to load the sled a little heavier than you might with other exercises.
4. Lateral Pulls
With the sled off to the left side of you and the straps taught, hold both handles in the center of your chest. Keeping your hands and the handles in place at your chest’s center, take side steps or cross-over steps, moving sideways. After one rep, turn around and repeat with the sled off to your right side. “This exercise is great for skiers—alpine and Nordic,” says McKhann. “It really works your legs in the same way you do when you’re setting an edge.”

5. Lunges
Another move that really works your glutes and hamstrings is the lunge. With the sled behind you and your arms stretched back behind you and holding the handles, take a step and lunge forward, bringing your back knee to the ground, then switch and repeat. This also works your triceps and back.
6. Press
Stand with your feet in a split stance (or, to make it harder, together) and, with the sled behind you, grasp the handles. With your hands in front of your shoulders, press forward (for a bench-press type movement) or up at a 45-degree angle for an overhead press. This engages your upper body in the same way a bench press with weights might though, as McKhann says, “you don’t have to worry about anything fall down on you.”
Featured Photo Caption:
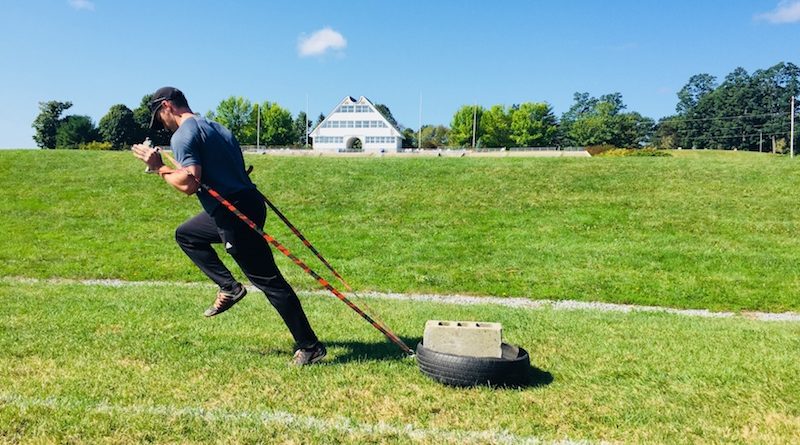
You can buy a sled for about $100 or you can build one yourself for about $15. To do so, take an old tire and slice one side of the inner wall. Add in a plywood platform to fit across the bottom. Attach a hook with a nut, bolt and washer. Buy a 16-foot strap, such as those used for roof racks (“I often have to take off the ratchets they come with,” says McKhann). For handles, cut two 1-inch diameter pieces of PVC piping and slip the strap through and tie a loop to make handles. Attach the strap in the center to the tire. Then add weight. “You can add cinder blocks (28 pounds), gym weights or even small children,” says McKhann. For videos, workouts and more on sled training, visit sledrx.com

