Talking technique with the pros at the Smuggs Ice Bash
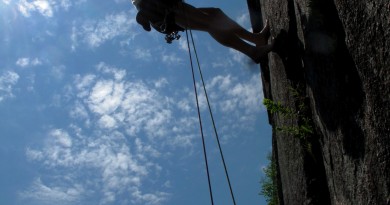
JEFFERSONVILLE — On a cold January morning, the base area for the Smuggs’ Ice Bash was packed with climbers of all abilities getting ready for a day in one of the Northeast’s best ice climbing destinations.
Bash organizer Tim Farr has been guiding in the area for the past four years and said while the official guidebook lists about 70 known ice routes, when you add that to the number of routes that combine sections of both rock and ice, a technique known as “mixed” climbing, that number is even higher.
“There’s a lot of variety to be found in the area,” he said. “And when you combine that with the way the ice forms every winter, no two seasons are alike.”
With professional guides from Petra as well as guest guides from around the Northeast on hand, advice for anyone just starting was readily available and I was looking to learn as much as I could and hopped from one group to the next. The clinics I encountered in the Notch were working on the more straightforward techniques of selecting routes, placing protection and ascending a variety of rock and ice faces with the aid of tools and crampons.
Here are some of the top ice climbing tips from the day:
Getting (safely) off the ground
The first group I came upon was at a rock and ice face called the Mystery Wall, where a group of five led by Petra guide Matt Bresler and assisted by Cam Latimer, a student instructor with the Wilderness Program at Saint Michael’s College, were working on an introduction to combining climbing tools and techniques on rock and ice.
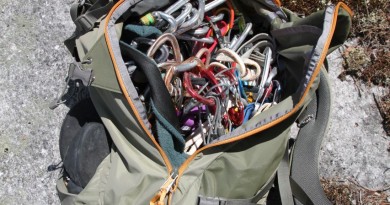
- While newer equipment and improved techniques continue to open up previously unexplored terrain, climbers always examine the quality of the ice they are attempting to scale before they step of the ground. These factors include its structure, the terrain above it and recent changes in temperature. Ice can be a fickle thing, Latimer cautioned, explaining that warm temperatures mean melting ice, but if the temperature drops too quickly, the ice becomes brittle and breaks when you climb.
- When placing belays on ice, climbers are careful to monitor the vector angles created by multiple screws, as this will have an amplifying effect when force is exerted on the system (i.e. when someone falls).
- Your stance on the ice/rock is important when placing protection. When placing the protection your weight-bearing arm should be straight and gripping a well-placed axe. You may have to knock away some soft ice to clear a spot for the teeth of the screw to solidly dig into more solid ice.
- Traveling in a high alpine environment comes with an entire world of risks to be considered. Gullies, where many routes are found, are often nicknamed the “garbage chutes” of the mountains and can rain chunks of rock and ice on unsuspecting parties. Climbers will loudly yell to warn people below of falling debris. “If you hear someone yell, “Ice!” Don’t look up to see where it’s coming from.
Moving up
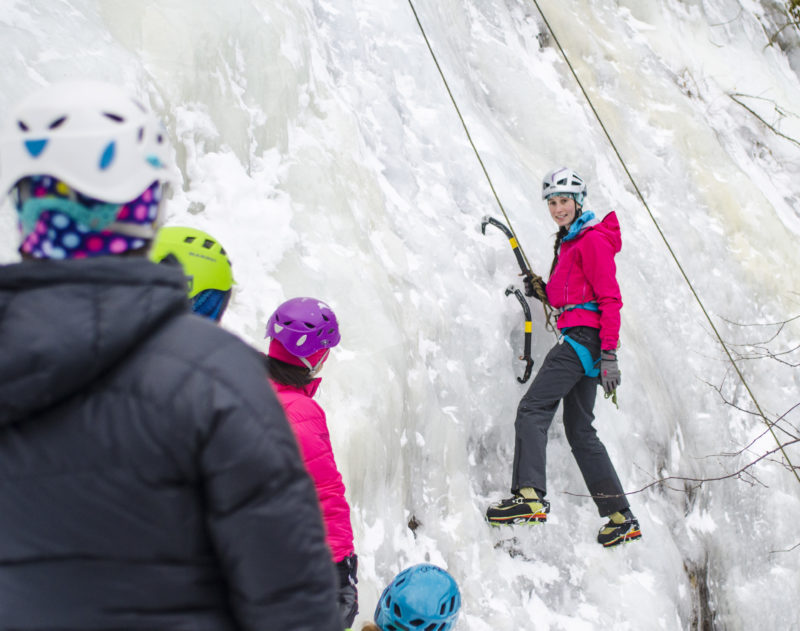
Movement up the ice requires familiarity with the tools and the best technique for how to use them, not just physical strength. Guide Michael Wejchert was leading a more advanced clinic on movements on ice and offered a few tips of his own.
- Movements while ice climbing emphasize fluidity. Incorrectly placing your tools or moving too quickly will cause you to “barn door” – swing uncontrollably away from the wall – or to tire yourself out.
- A common mistake for beginners is using the tools too aggressively or relying on them too much. Instead, it’s important to think of them as a source of balance as you move your legs up. Aim for a space the size of a basketball directly above your head, but not so high that your arms are extended.
- The curved shafts of today’s modern ice tools often require more precision than power. All it takes is a swing of the arm and flick of the wrist, and you’ll be able to find a reliable placement. Give yourself three attempts to “stick” it before pausing to shake out your arms. If you don’t get it in three swings, try somewhere else.
- And as always, don’t forget to keep breathing.
Footwork
Ian Osteyee, sole guide and owner of Adirondack Mountain Guides was holding a clinic of his own on climbing some of the more challenging surfaces, such as when ice is thin or has formed inconsistently. The first step he said is to watch your feet. Osteyee gave a brief demo.
- “It’s hard to think of your boots as tools instead of simply footwear, but you have to when you’re ice climbing,” he said. Much of the movements originate with basic climbing technique, but a great place to start is with your feet, which will give you more stability and reserve your energy.
- You can kick the points into the ice so they bite or you can place them in pockets, on edges or any irregularities in the surface of the ice, much the same way you would use the soles of your shoes while rock climbing. The more effective you are with your feet – and those toe points – the more you’ll reserve your arms. “Just kick once,” Osteyee said. “Never place a blind foot. If it doesn’t stick, find somewhere else.”
- Placing your toe points works well if the ice has lots of featured and isn’t a uniform sheet of ice. Here just think as though you were rock climbing. Again look where you want to place your crampons before making any move. You are looking for any sort of feature that you can place your crampons on.
- A common mistake is to angle your heels too high, causing the front points to pop out. Keeping your heels level increases the amount of force on the front points – pushing them further into the ice and avoiding slips.