
DIY: Build the Van of Your Dreams
The author and Takoda Edlund set out to rebuild a van into a mobile home of their dreams and set out to travel across the country. Here’s how they did it and for the story of their travels, see A Van & a Plan.
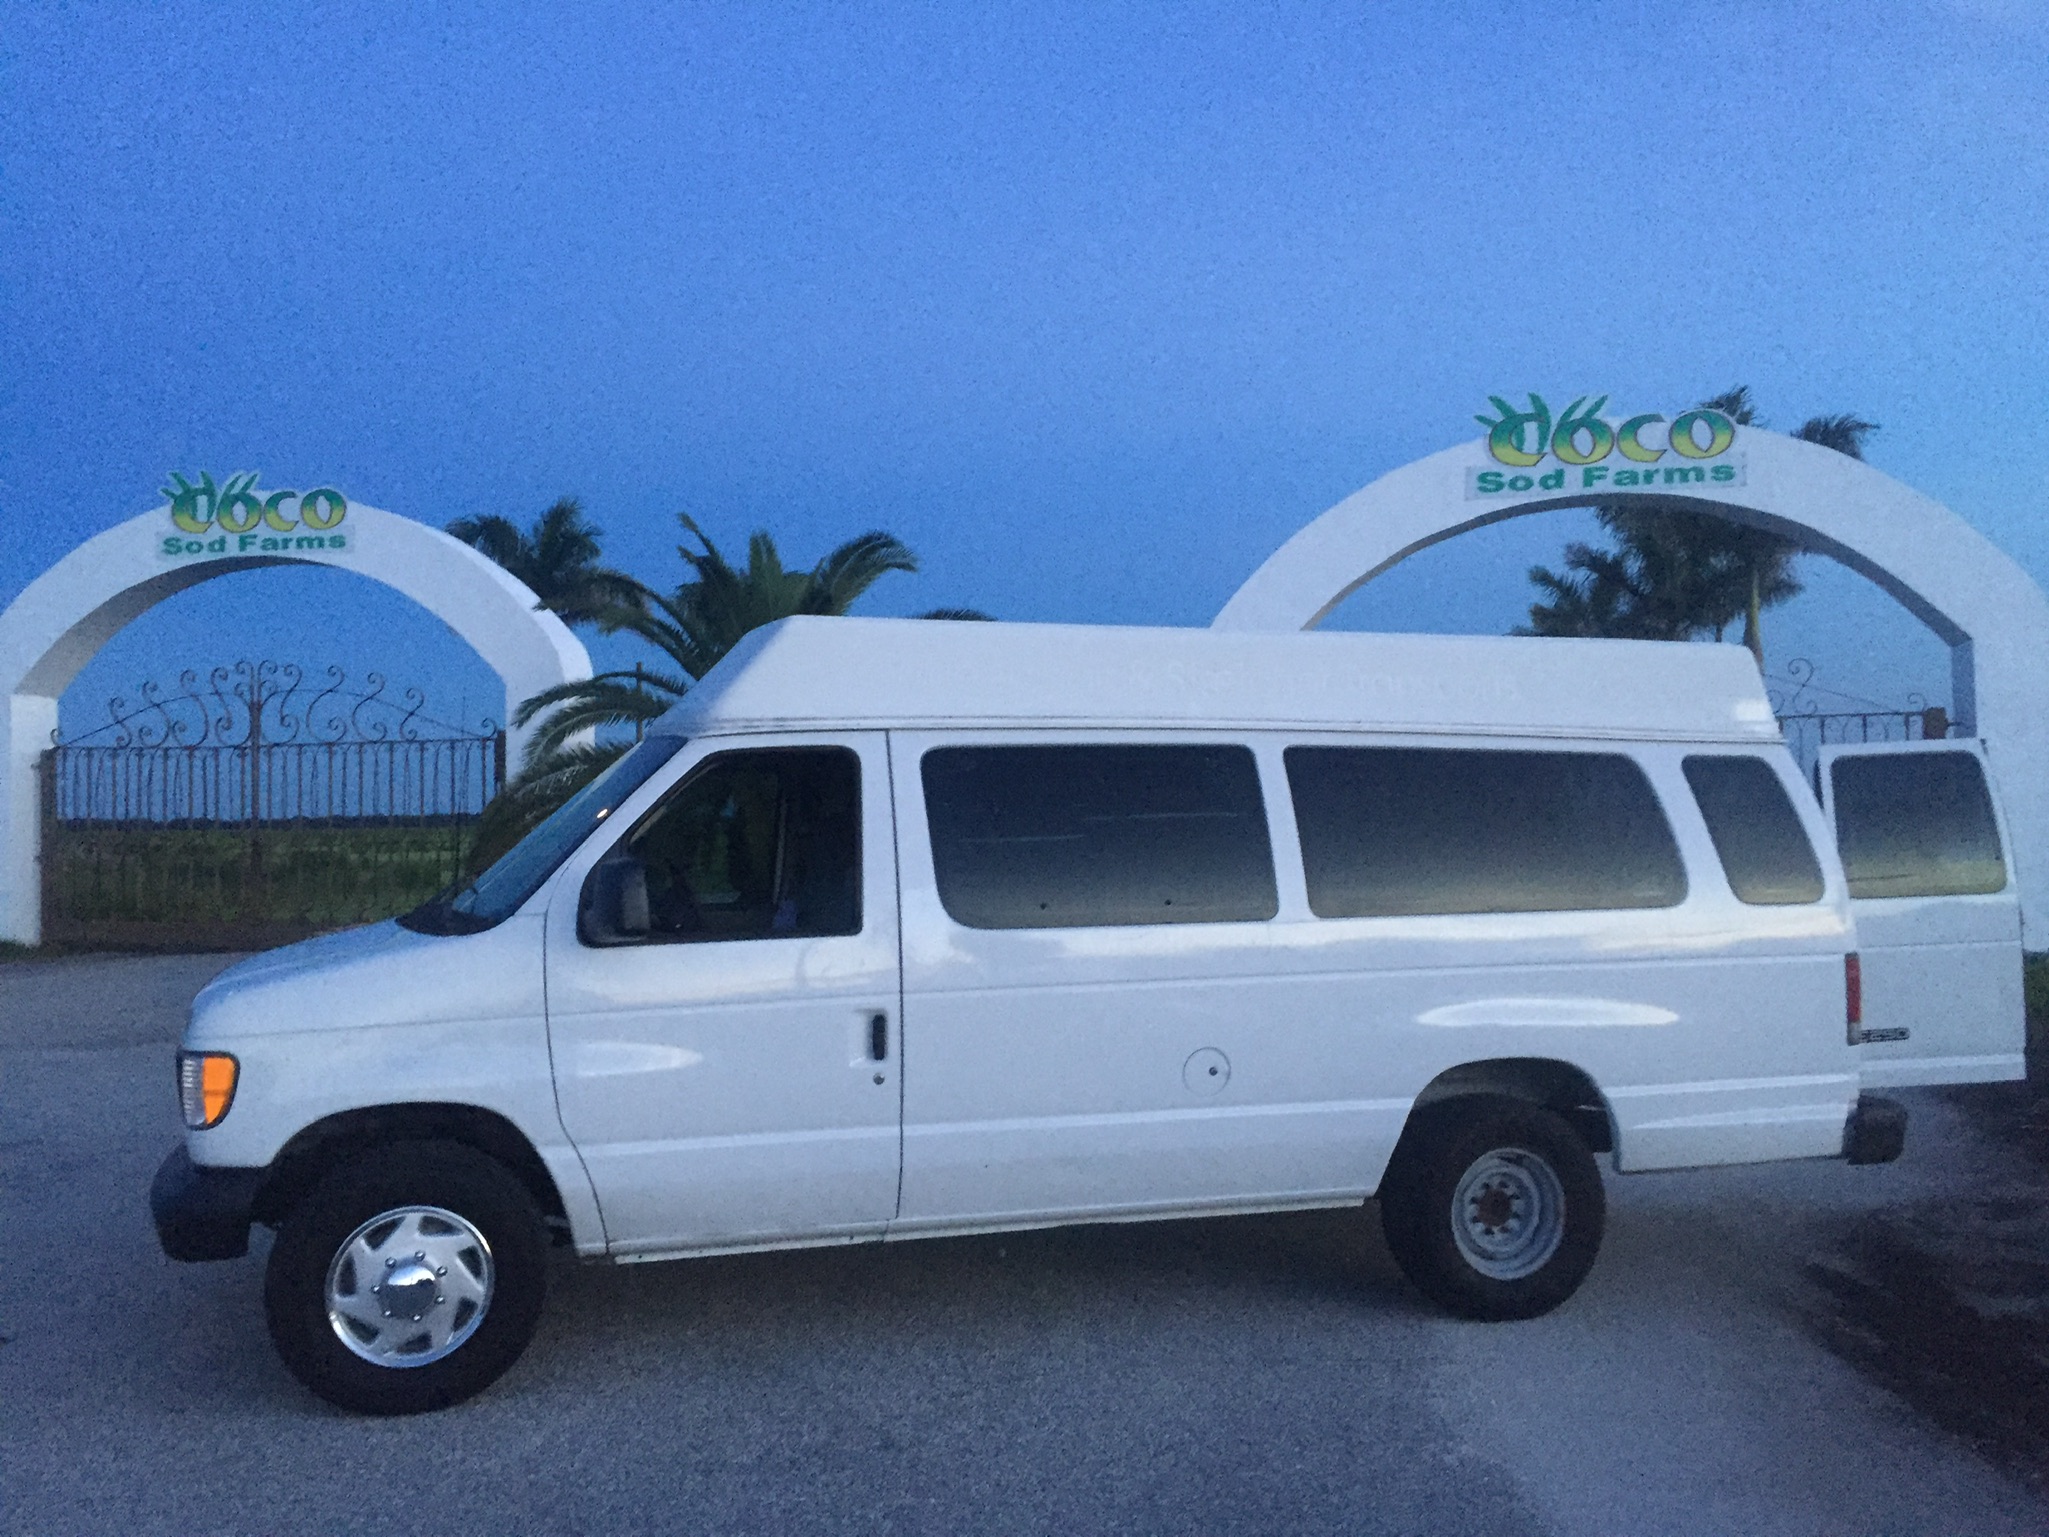
Step #1: Buy a van
The particulars of this process depend entirely on your price range. We had less than $5,000 to burn, so we patrolled Craigslist, Facebook Marketplace and used car lots for months before finding something that checked all of our boxes. We wanted our van to be:
- Big. A high top or Sprinter van.
- Customizable. We stripped it down to its metal shell.
- Mechanically sound.
Little did we know, this last box far from checked. Surprises are fun, right? We recommend bringing your van to a mechanic before purchasing, and making sure the mechanic plugs the van into a computer to check for outstanding codes.
Step #2: Plan your layout
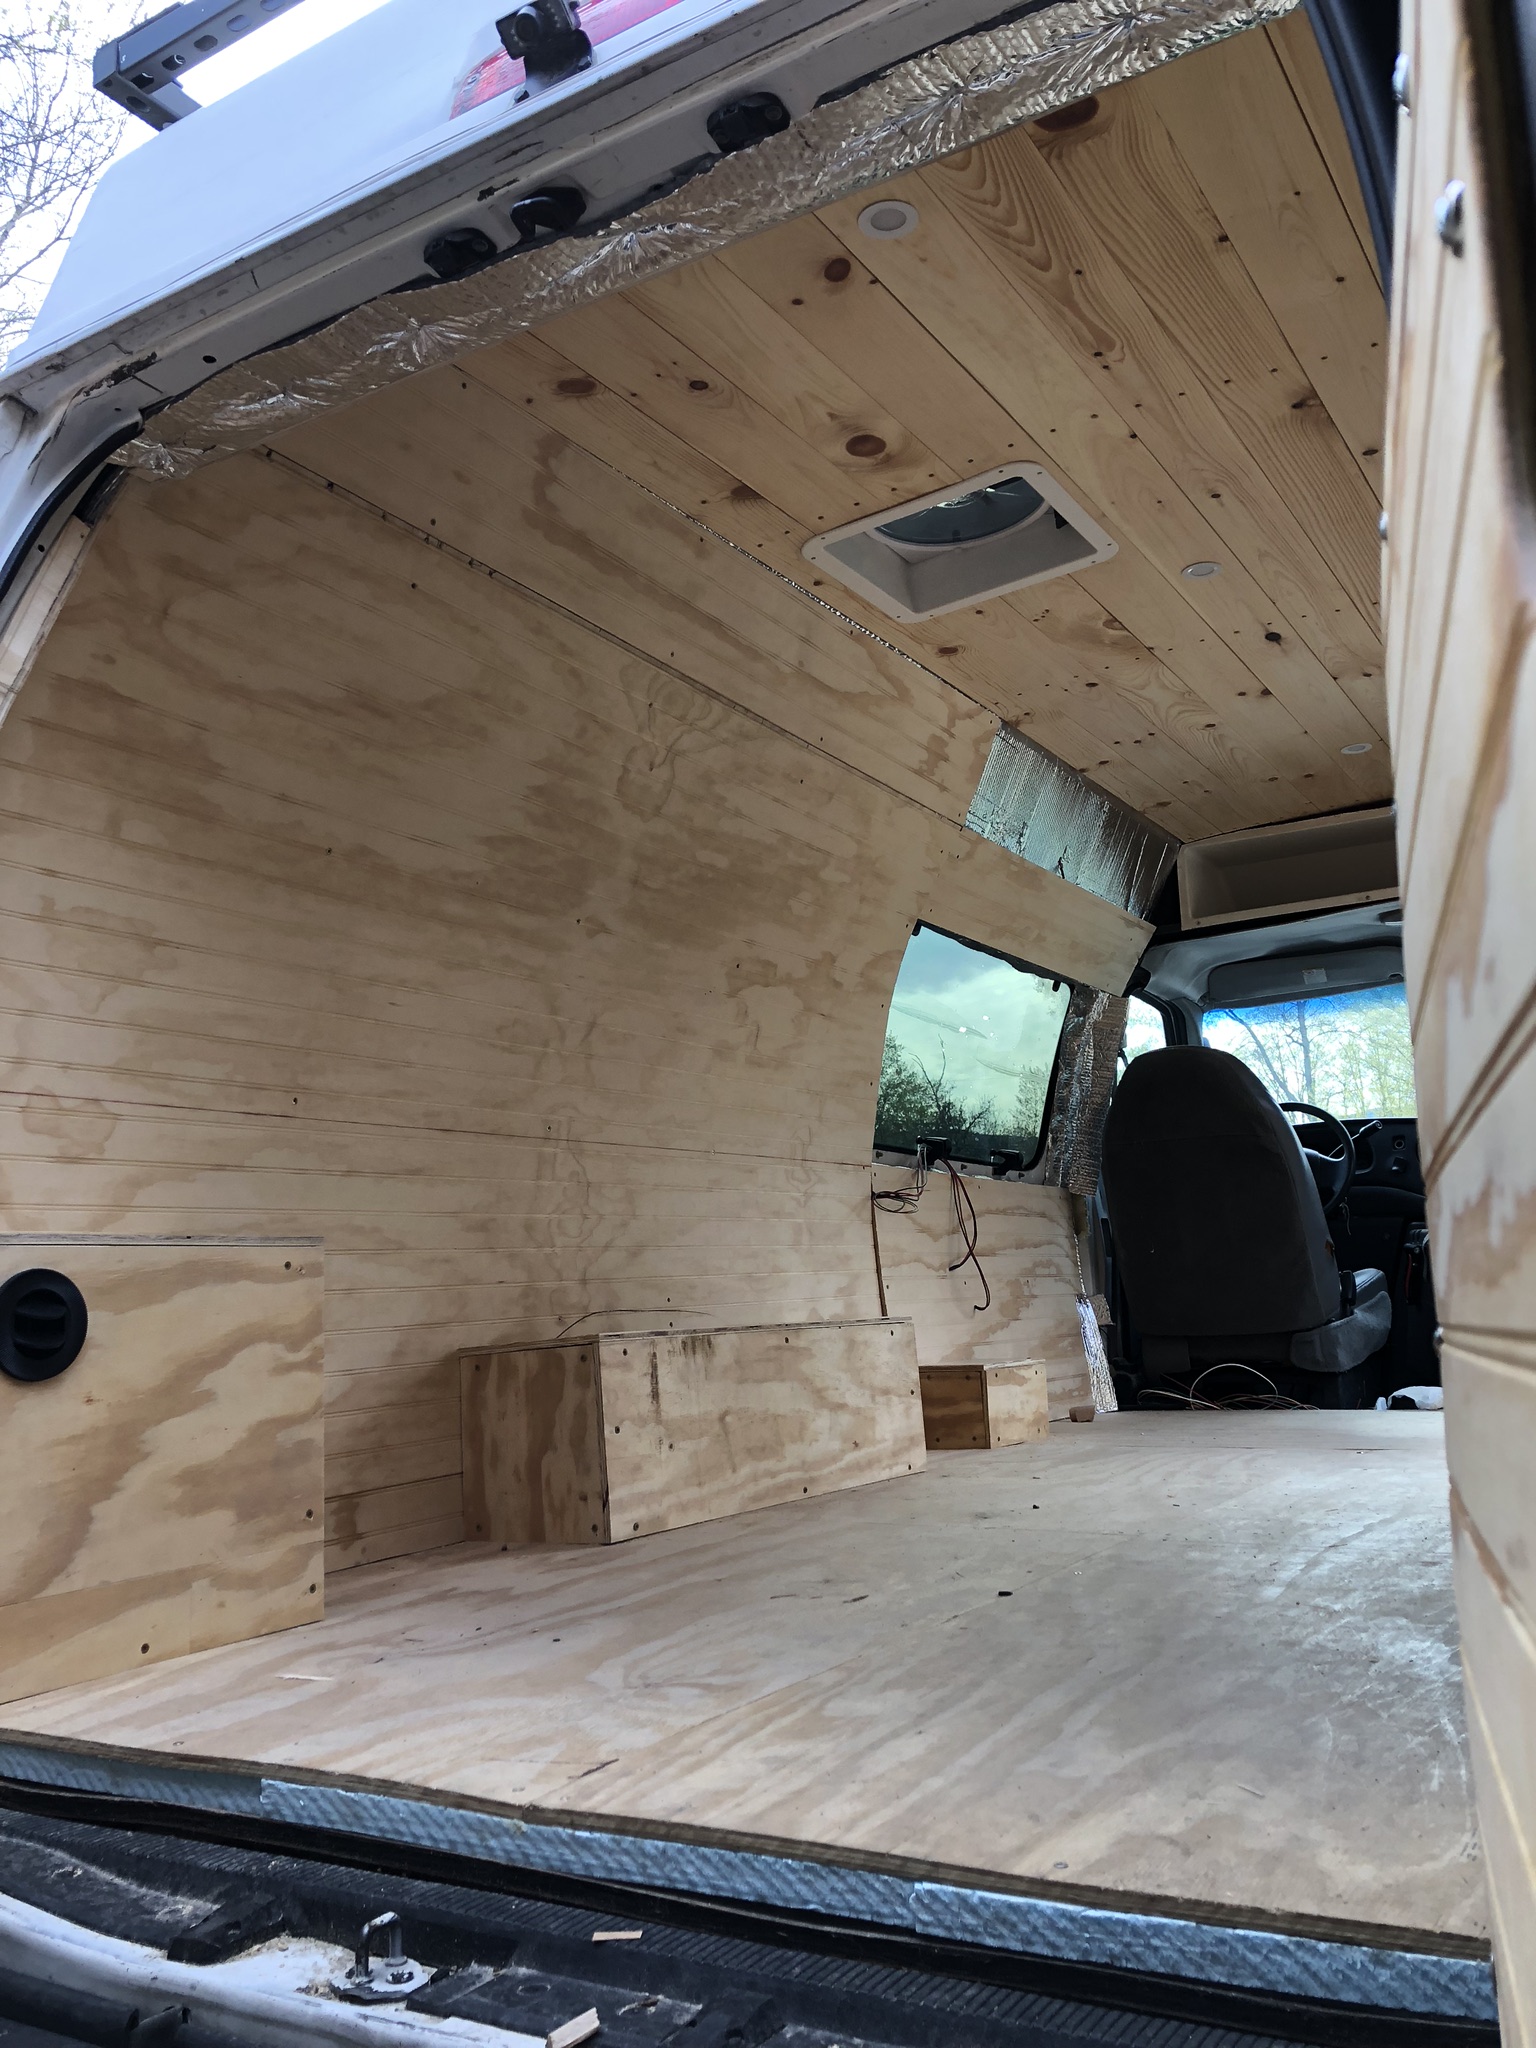
We tore out the inner plastic paneling, back seatbelts and anything we could. Then came the hard part: deciding how we wanted to structure our space. Once the van is insulated, running electrical wires becomes a tricky feat, so wiring was one of our first steps. That means we had to know where we were putting lights, switches, fans and outlets when the van was still an empty shell. Plan carefully!

Step #3: Install a fan
Ready to cut into the roof of your automobile? First, we reinforced the van’s fiberglass roof with a wooden frame to which we could secure the ceiling fan. We used a jigsaw to—very carefully—carve a fan-sized hole in the roof, then secured the fan using Dicor sealing tape and doubled down with caulk to prevent any leakages.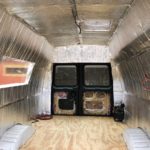
Step #4: Insulate. Everywhere.
With electrical wires loosely in place, we set to work insulating. We used hardboard insulation under the plywood floor, bat insulation in the ceiling, Reflectix for the walls, and spray foam in all the nooks and crannies. Take note: Reflectix requires a 3/4-inch air space to be effective, so we stapled the foil-like sheets to furring strips and pulled it tight to the wall. The furring strips, which looked like whale ribs, gave us something to which we could attach future wall paneling. With Reflectix in place, we were ready for blast-off.
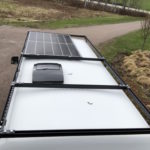
Step #5: Maximize your roof space
Depending on your build, you may want to add some space on the roof for solar panels, a Thule box, ski racks, kayak holders, or even a deck. All of these require a roof rack. The roof rack presented a challenge for us: Anything custom-welded was far too expensive, and because of our fiberglass roof, typical cross bars were impossible to use. So we decided to make our own! Takoda drew up some brackets and sent the designs to a local metal shop, then painted them with several coats of truck bed liner. We bolted them to the roof with plywood backing plates and Gorilla glue to ensure no future leaking. Next, we bought some Unistrut from a local electrical supply company and cut it to the van’s dimensions, then added cross pieces and painted it with more truck bed liner. We attached our 320-watt solar panel, an LED light bar, and a Thule box for extra storage.
 Step #6: Put up walls
The woodorking journey begins here. We used beadboard for the walls because it bends, capturing the contours of the van, and it’s cheap and easy to work with. We built and insulated around the wheel wells and gas tank inlet as well. We covered exposed metal on the doors with custom-cut beadboard panels, too.
 Step #7: Turn on the lights
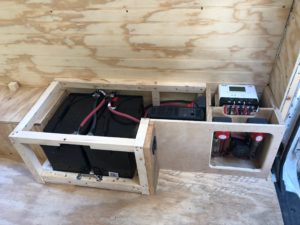 For power, we attached two 12-volt, 100-amp-hour deep cycle batteries to our 320-watt solar panel. We connected these to a charge controller that allows us to monitor the battery level, charge and load metrics, and all types of other useful information. We used a basic fuse panel to connect all our 12-volt electrical appliances, including the lights, ceiling fan, fridge, plugs, and USB plug-ins, and keep them organized. We added an inverter so we could plug in standard 120-volt appliances, like a laptop. We fused and switched every part of the system for safety and control. Avoid pesky electrical fires by reading all of your product’s technical specifications. Crunch your numbers twice, folks!
Step #8: Make a dream bed
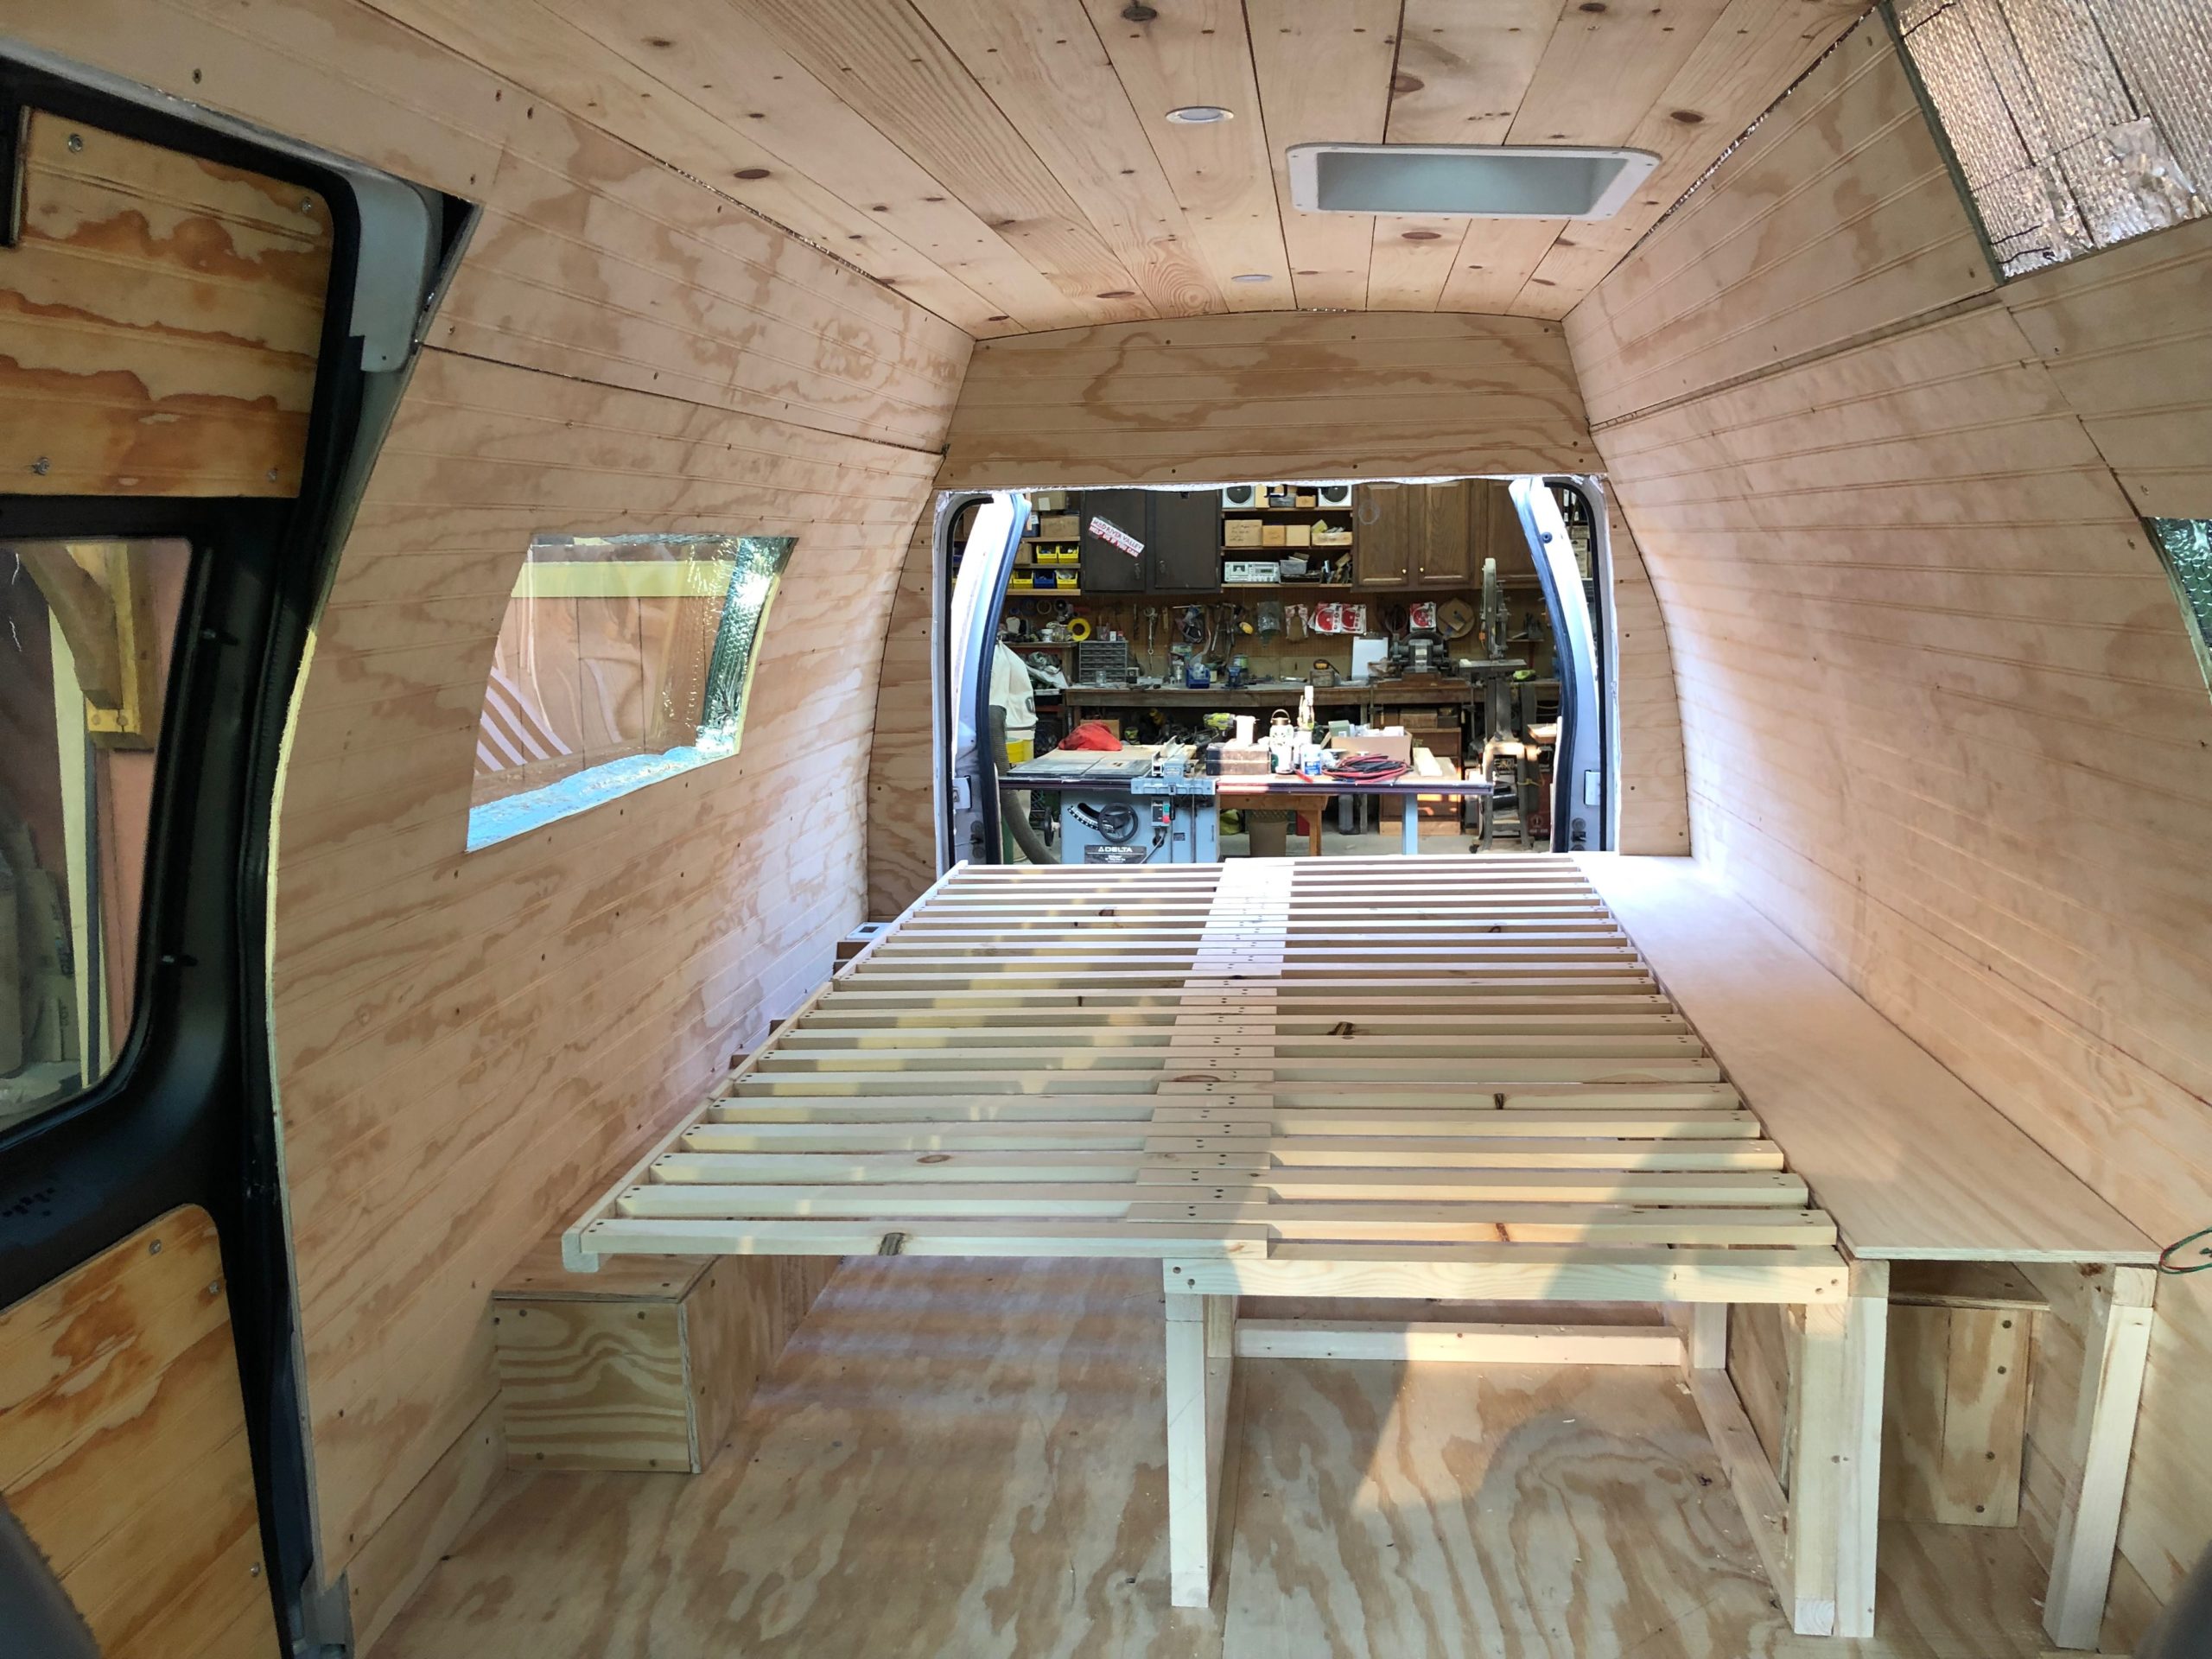
Takoda is a six-foot-two insomniac, so building a big, comfy bed was a top priority. Our bed acts as a living room, couch and dining room chair, further raising our standards. We opted for the slightly-more-complicated slide-out bed design, using alternating slats to give us “bed mode” and “couch mode.” It’s split into two sections, which we hinged to the wall, allowing access to storage below. The final dimensions made it a “full extra-long” bed, and after hours of internet scouring, we finally found a comfy mattress, soft enough to fold, that fit.
 Step #9: Shelves, cubbies and drawers
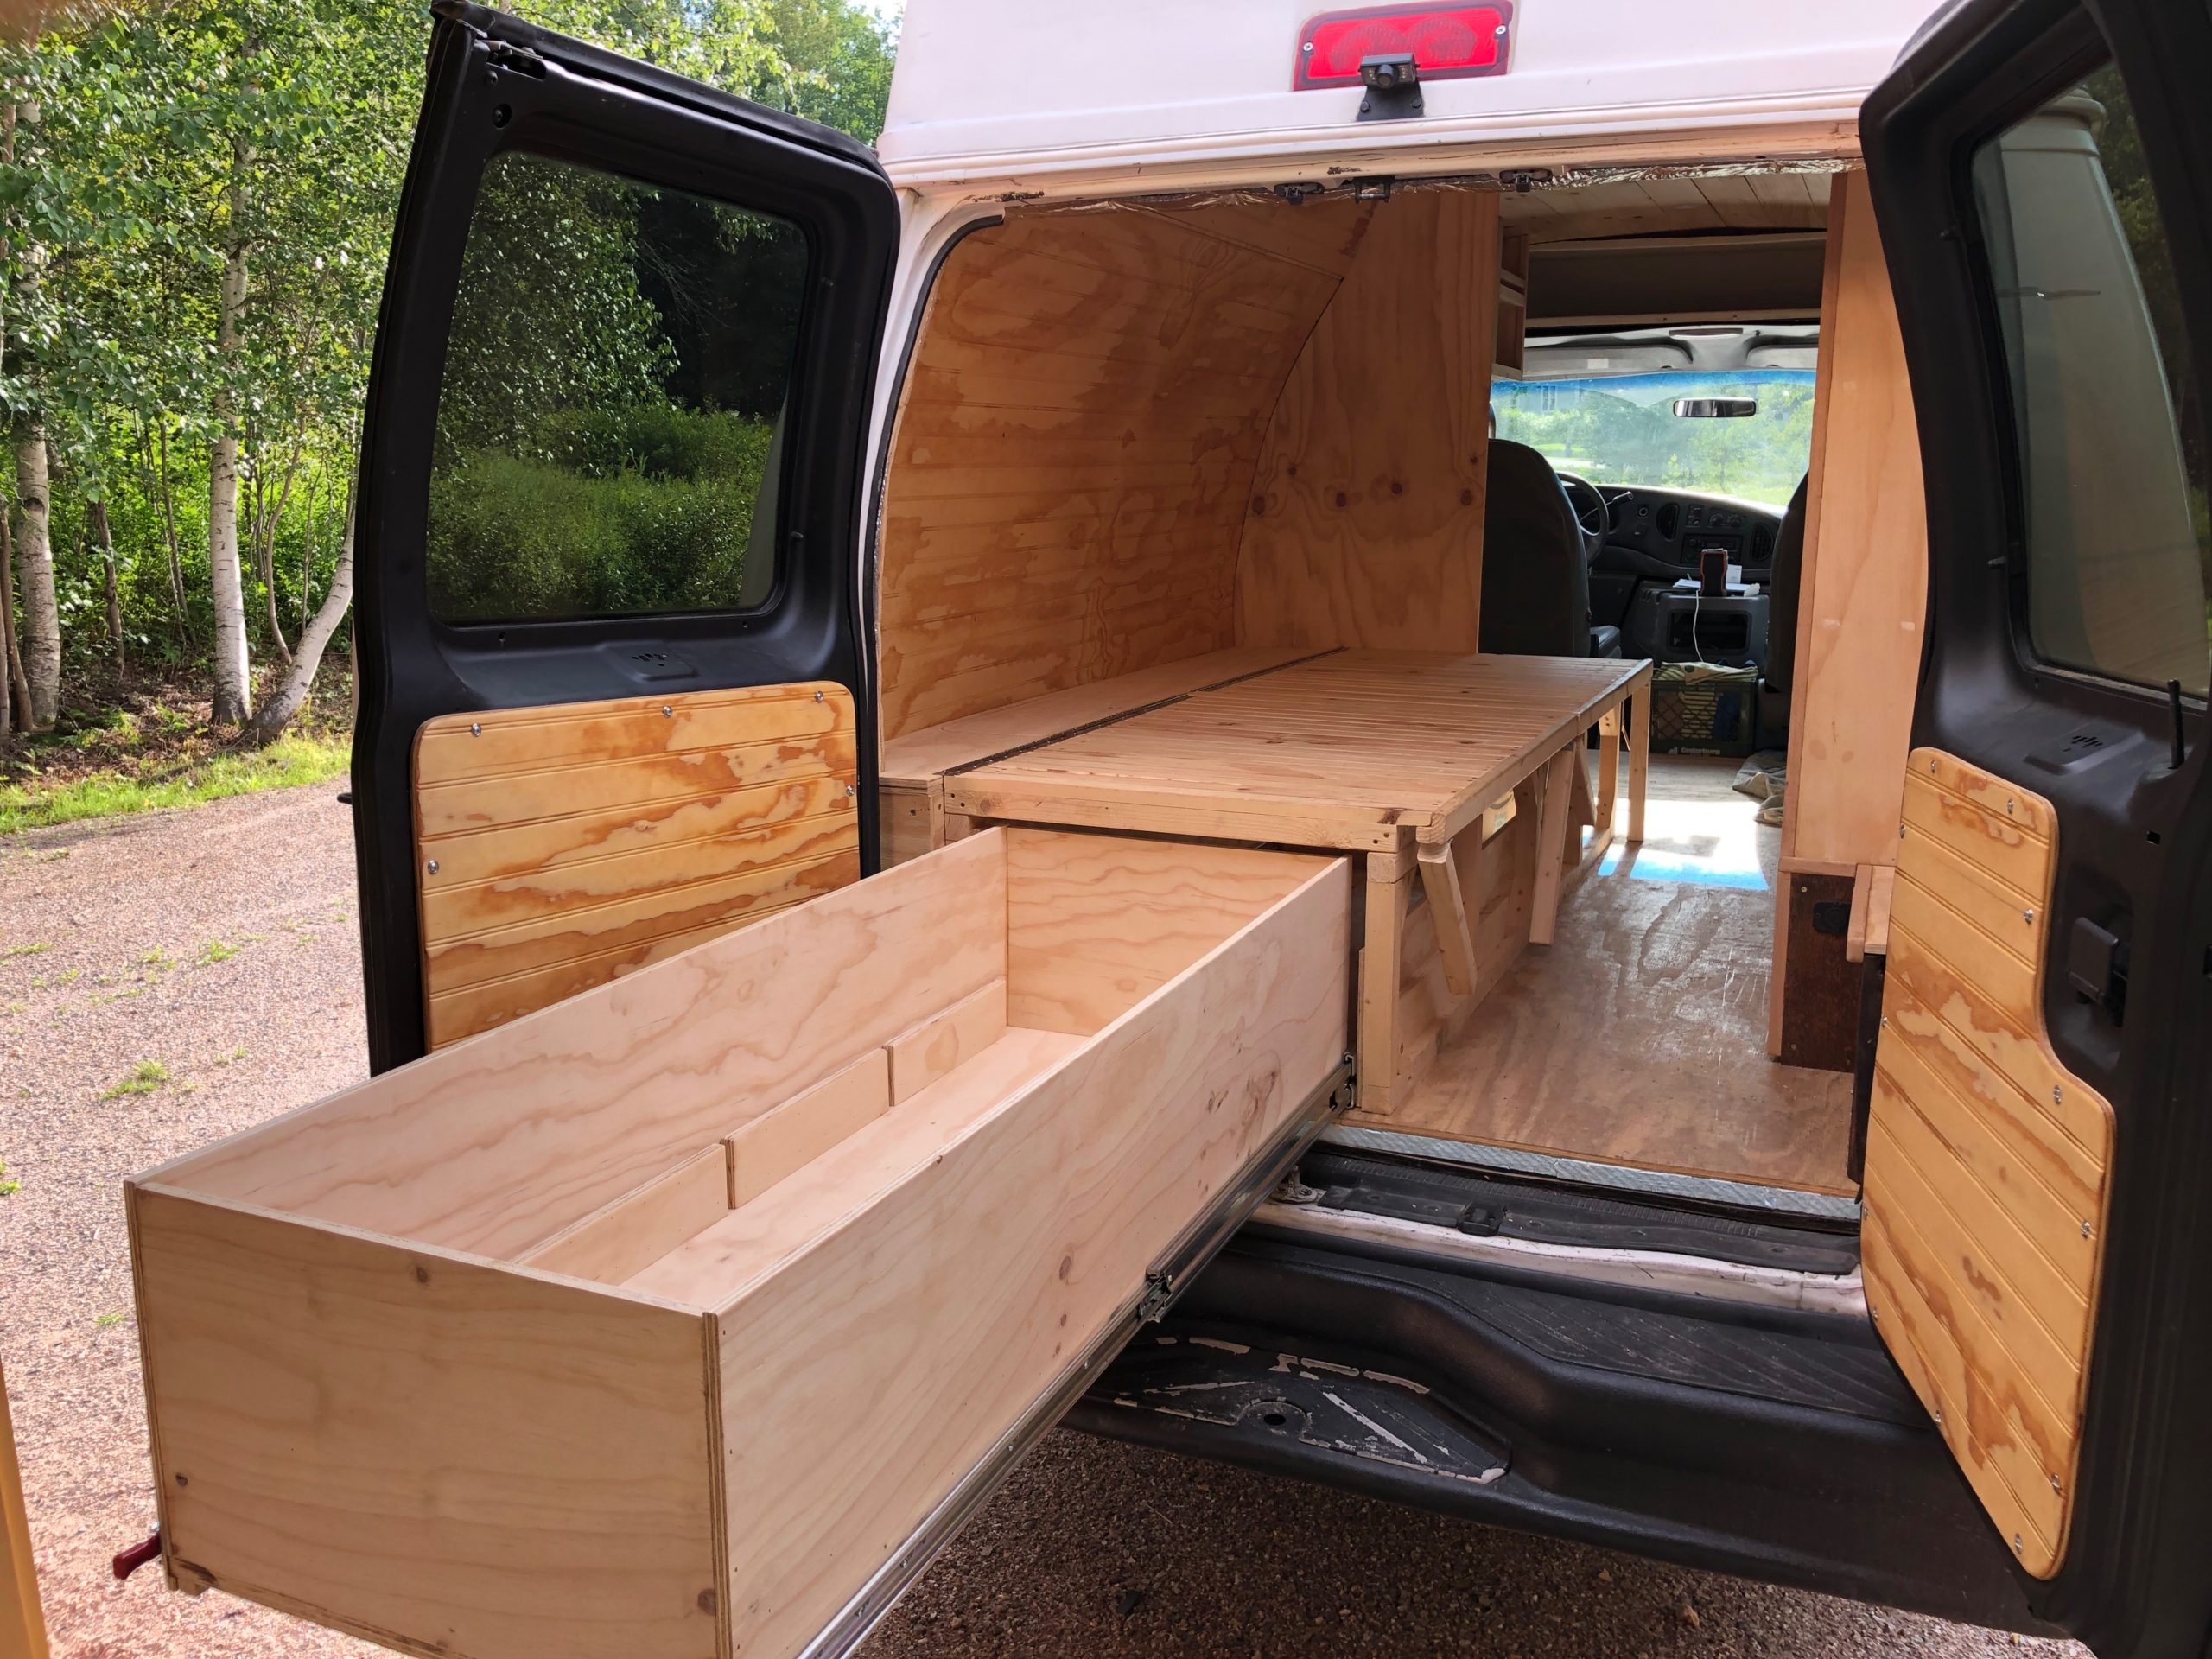
It’s time to decide how your belongings will fit into a 60-square-foot space. We used cubby-like shelving, made from plywood and faced with stained red oak for our clothes and kitchen food storage. One of our favorite features of the build is the drawer that pulls out the back door from under the bed (also known as “the guest bedroom”). The storage box is almost five feet in length, and the drawer slides can support 450 pounds of gear. This is where almost all of our outdoor gear lives.
 #10: Assemble your kitchen
 In a creative exercise, Takoda transformed a live-edge cherry slab, donated by a friend, into our kitchen countertop. This would become the van’s metaphorical hearth and physical centerpiece. He bridged cracks with maple dovetails, cut a hole for the sink, and applied several coats of epoxy. We used a stainless steel hotel pan for our sink, and mounted a flexible faucet with a filter below. We spent hours debating whether to buy a cooler or a 12-volt fridge, but finally found an ICECO 40-liter fridge for $364—roughly the price of a similarly-sized Yeti cooler (the same product is now $529). The fridge is efficient, quiet and able to fit two week’s worth of food if you pack it right. For water, we decided on a seven-gallon freshwater tank and a four-gallon greywater tank. Our fully mechanical foot pump system, made by Whale Gusher, helped us conserve water. The plastic tanks live under the sink for easy access.
STEP #11: Make A tiny VAN a tiny home
Takoda added bamboo flooring, left over from one of his dad’s house projects, to an existing plywood base. Emma fashioned curtains to protect the clothing and food cubbies from driving turbulence. We placed trim along all of the van’s creases, installed dimmer switches for the ceiling and kitchen lights, faced the drawers with red oak and found nifty handles at Burlington’s ReStore. Finishing touches included a bookshelf, a table that slides out over the bed for cooking, Netflix watching and card playing, and custom wooden holders for our potted plants. Time to move in!
